Importing Depth Maps from LeiaPix to Blender
Overview
In this tutorial we will outline how you can import the depth map generated by LeiaPix into Blender. This will allow you to sculpture the image using a depth map to produce a mesh model of the image. We will also provide some guidelines and tips on how to optimize the results.
For this we will be using a Blender Add-On (a Leia modification to a 3rd party Add-On) that performs the initial import. For those interested, we outline in the Addendum below what this Add-On does so that if you are familiar with Blender, you could optionally also perform these steps yourself and customize them to your needs.
Furthermore, this tutorial demonstrates the fundamental process of importing a standard depth map. However, it does not encompass the import of 360-degree depth maps or videos. We foresee that these aspects may be included in future, more advanced tutorials as we are soon to release these features in our products.
Setup
Please take note that the steps outlined in these tutorials were performed in the specified environment. We expect that these steps will function in other environments as well (such as macOS), albeit with possible minor variations. The specified environment serves as a point of reference, enabling you to pinpoint discrepancies if you encounter any challenges. Additionally, don't hesitate to share your findings here in the comments, and we will strive to provide interactive assistance to the community.

We also provide samples that you can use to save you having to find your own content for trying out the steps in this tutorial. The sample content can be found here:
Create and Export Depth Map using LeiaPix
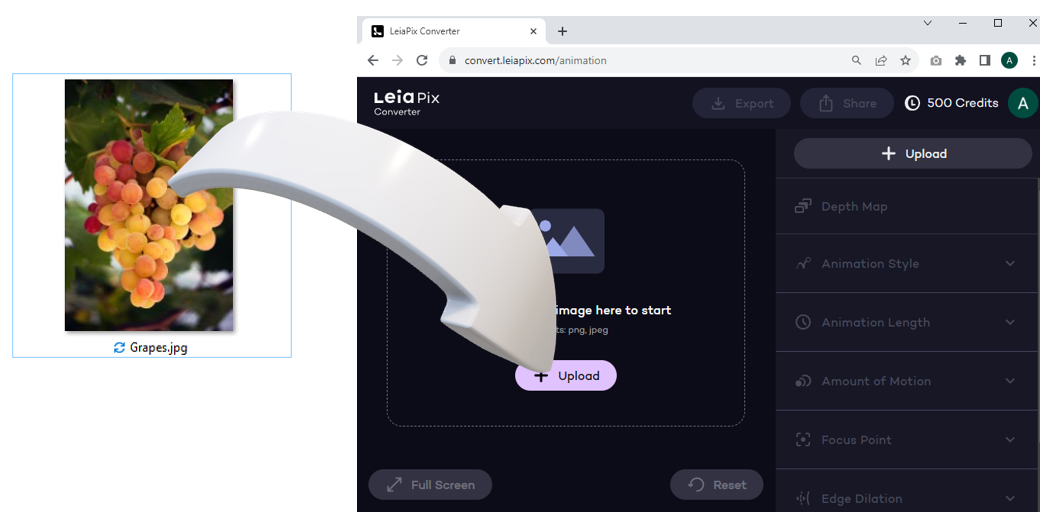
3. Wait for image processing. Once complete a 3D animation will appear
4. Optional: Perform any depth map edits.
Install Blender Add-On
2. Open Blender
3. Install the Add-On by navigating to Edit > Preferences > Add-Ons and clicking "install…". Then navigate to the location you downloaded the importdepthmap_1.1.1_LP1.zip file and select it and click on "Install Add-On"
4. Tick the box "Import Export: ImportDepthMap" to enable the Add-On and exit the preferences dialogue.

Import Image and Depth Map

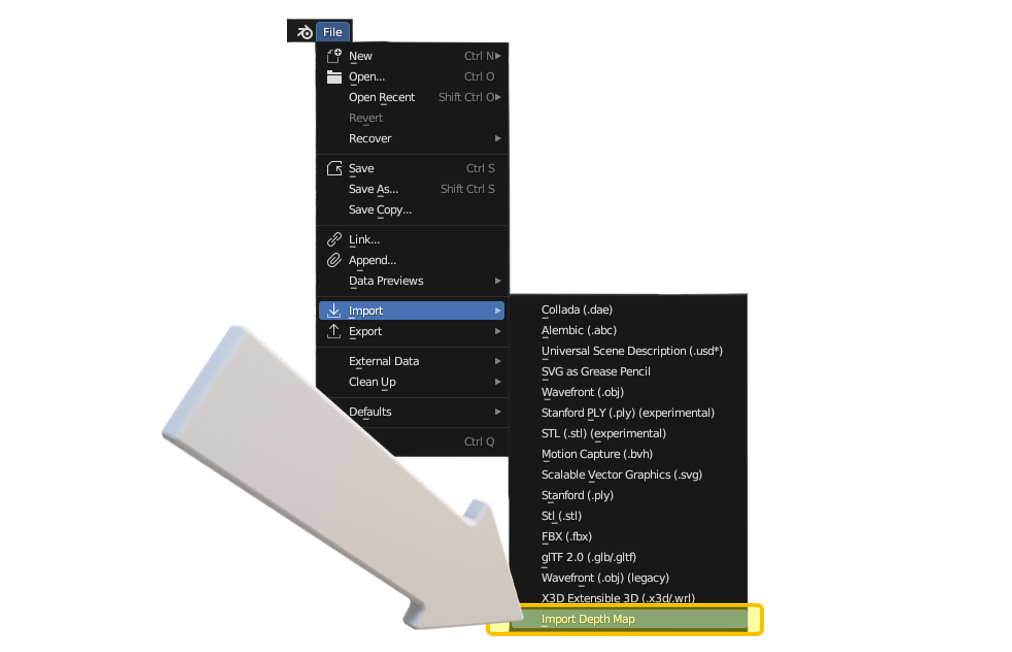
2. Select File > Import > Import Depth Map from main menu.
3. Select the "Separate Depth Map" tick box

5. Another file dialogue will appear. This time select the depth map image that was created by LeiaPix and click on "Load Depth Image"
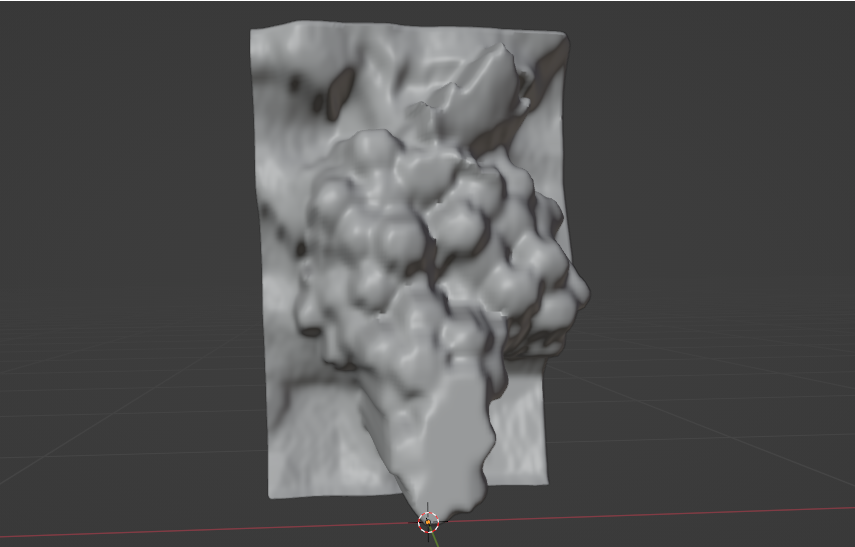
6. You should now see an object in the Viewport of Blender like this. Feel free to navigate around this object.

Adjustments
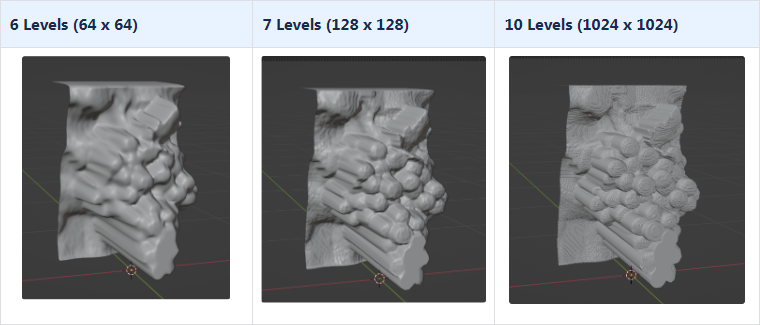
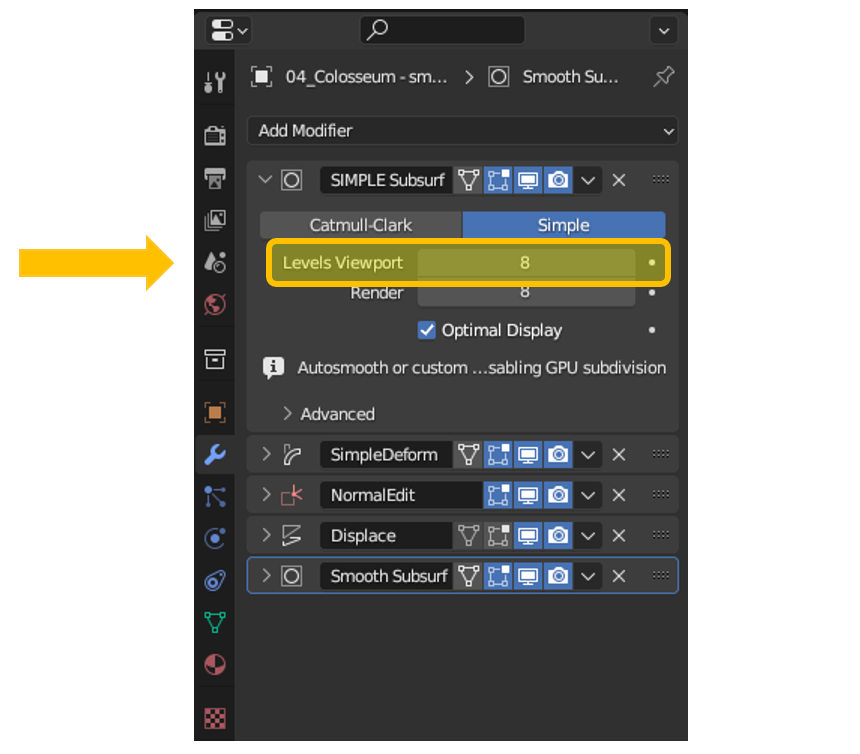
By default the sculpting is performed on a 64 x 64 mesh grid. However the image and depth map you are using is likely to have a much higher image resolution. For this reason the model may not look as crisp as it could. You can increase the grid resolution to increase the model definition. There is a trade-off however between performance and resolution. You will find that using a higher grid resolution will use more CPU/GPU and memory and therefore has the potential to slow your work down in Blender. But generally you should be able to increase this to more than the default.
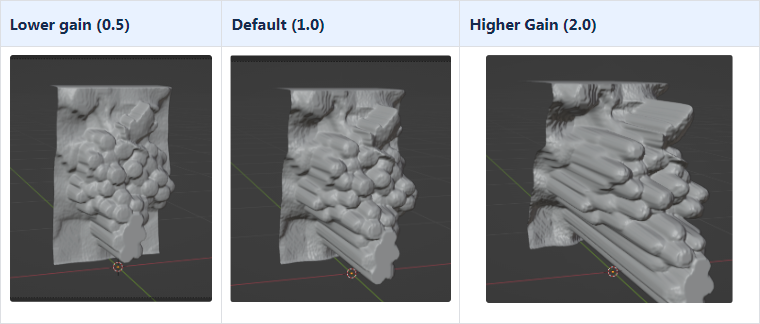
You may want the depth map to take more effect or less effect. You have control over the gain that is applied to the displacement.

Photographs don't adhere to orthographic projection; instead, they capture a perspective view. Essentially, a photo encompasses content observed within an angular field of view. This becomes apparent, for instance, when photographing a tunnel. The end closer to you will appear larger in the photograph than the far end even if the entry and exit in reality are of equal size. We need to restore objects in Blender to their actual sizes. To do this we can't simply extrude from a flat plane, as that would produce an orthographic projection of the image. We need to extrude from a curved plane forming an arc that spans the field of view of the camera to more accurately reproduce real world objects. The following diagram depicts the field of view for various different camera lenses:
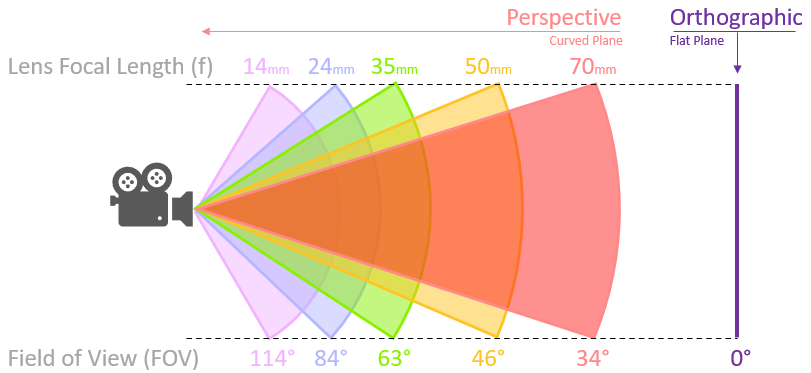
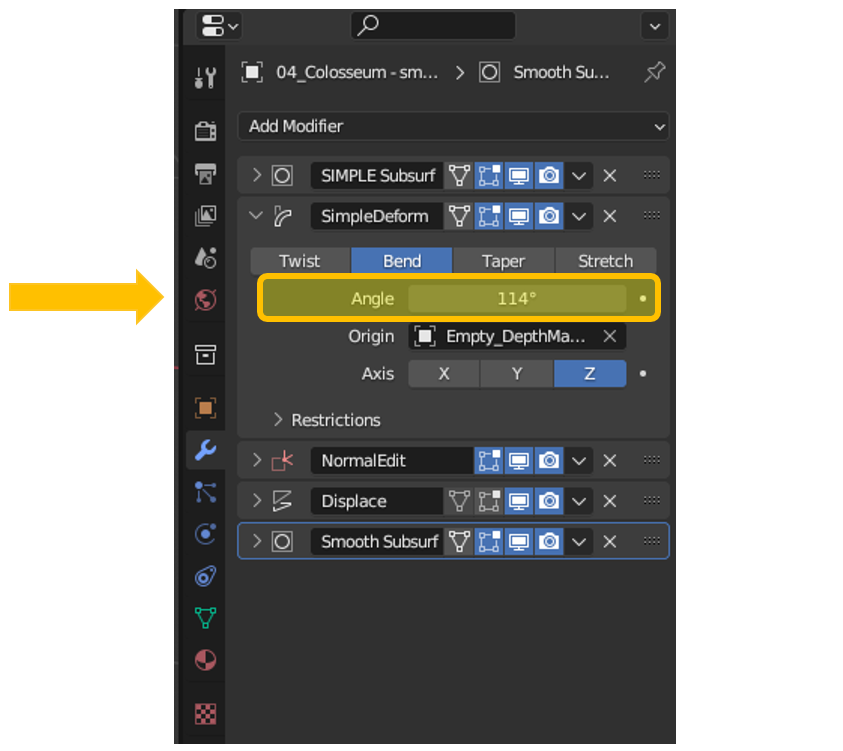
By default the extrusion plane is flat in blender and therefore has a zero degree field of view (which is orthographic). You can however achieve a perspective extrusion by controlling the curvature of the mesh plane. This is achieved using a deform modifier and adjusting the set angle to required field of view.
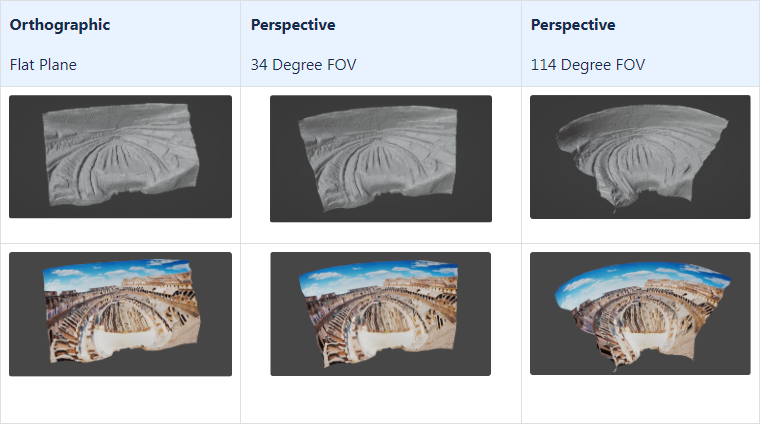
The following example illustrates how this improves the resulting 3D model. Here we use a depth map of the Coliseum and apply curvature to the model corresponding to various Field of Views.
This section is informative only and is not required for an import to be performed. It is provided for those who want to understand how this Blender Add-On works.
The code is based on the original work from Elin (https://github.com/Ladypoly). The original code is referenced here:
Features of this basic functionality:
- User provides file location to RGB image
- User provides file location to Monochrome Depth Map
- A Plane object is created
- The RGB image is mapped to the plane object as Base Color
- The RBG image is again mapped to the plane object as Emission so that the rendering is not light source dependent (in other words has it’s own “glow”). This avoids unevenness in brightness and avoids introducing unwanted shadows in the final rendering.
- The Depth Map is placed into a Texture. In the modified code the following changes have been applied:
- The image is mapped using the extend method to avoid the depth map UV from wrapping around the plane as this causes edge artifacts
- The image colorspace is changed from sRGB to Raw so that color corrections don’t impact depth. - The Plane is subdivided into a mesh (with as many divisions as possible given processing power and memory). The original Blender Add-On goes to 6 levels of subdivision. The modified version has this increased to 8.
- The Plane is curved using a Deform Modifier to correct for Camera Field of View distortions. The modifier is anchored to a empty object to provide a point of reference. This makes orienting the deformations easier. Both the modifier and the empty object are additions to the original code.
- The plane is displaced using a Displacement Modifier with reference to the Depth Map Texture.
- Rendering can be performed with the faster Eevee Render Engine as we are not concerned with light/material interaction, we are merely re-rendering an existing image from different viewpoints. As such we don’t really want to introduce unwanted artifacts from a more complex rendering engine
- Importing of Panoramas
- Automatic camera rig setup