How to view LeiaPix content in VR Headset
Overview
Did you know you can view the creations you make in LeiaPix on a VR headset? There are various ways to bring these to life in the realm of the immersive and here we will detail a few of these. We will outline:
- Viewing SBS image in stereo using a number of different methods
- Viewing Facebook 3D image in native browser
- Using Depth map in Blender with native VR functionality
These have all been tried on a Meta Quest 2, currently the most commonly used VR headset, but these methods should also work on other headsets where indicated.
LeiaPix
For all the methods we will discuss, it all starts in LeiaPix.
LeiaPix Web Application
To view the content from LeiaPix in any other application, we need to first create it and then export it.
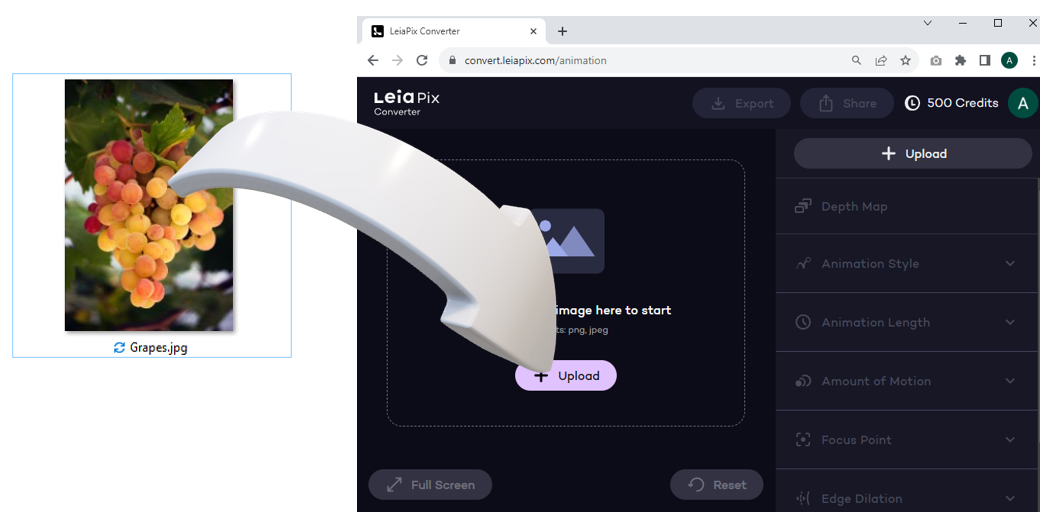
To create content follow these simple steps:

3. Wait for image processing. Once complete a 3D animation will appear
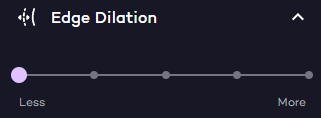
4. Set Edge Dilation to zero:
To acquire the content needed for this tutorial, download a Full Package Export.
The sections below will outline how to process some of the files exported as part of the Full Package Export to view them in a VR Headset. Remember, you also have the choice to selectively download only the required file for a specific section without needing to download the entire Full Package if you are only interested in processing a particular section of this tutorial..
Facebook 3D Export
This is one of the simplest, quickest and also one of the most impacting methods to view your content.
Quest, Quest 2, Quest 3 or Quest Pro Headset
- Meta Quest Browser (installed by default) or
- (optional) Facebook (Beta) App install from
 Facebook (Beta) on Oculus Quest 2
Facebook VR
Export
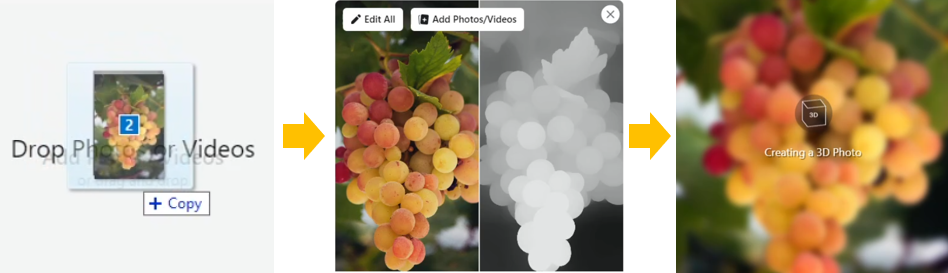
- original image use a filename and add a suffixed of “FB-3D”
Example: image1_FB-3D.png - depth map use same filename but use a suffix of “FB-3D_depth”
Example: image1_FB-3D_depth.png
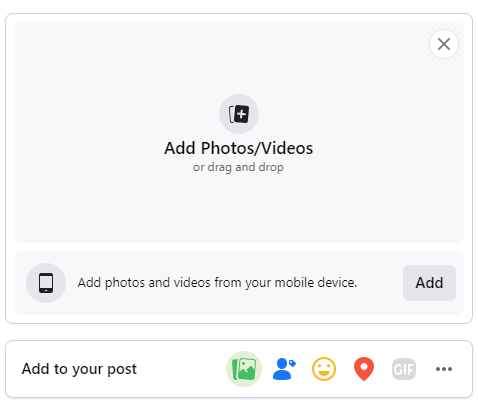
Create Post
1. Click Photo/Video at the top of your News Feed, a group or your Page.


Open Post on Quest Headset
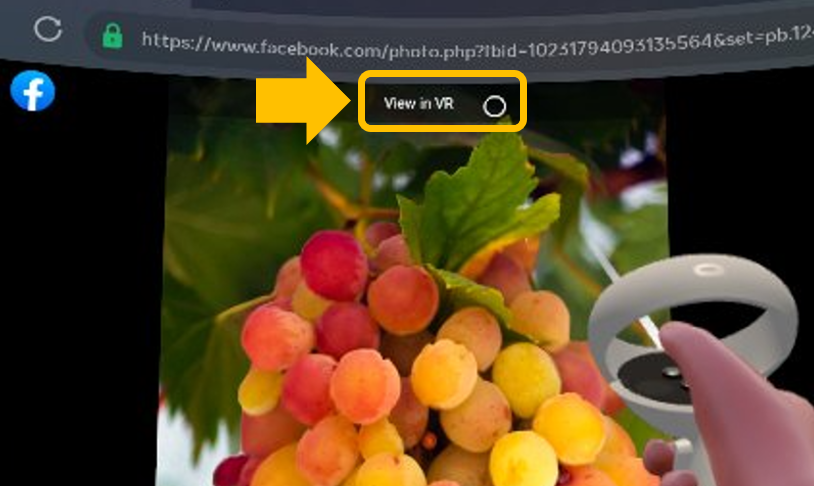
Enjoy the View
Depth Map Export
We have already in another tutorial shown how you can export a depth map and sculpt a model with it in Blender:
You can take this a step further by viewing this model in a VR headset directly from Blender. This is a free solution but does take a little more setup than the Facebook solution. It also has wider support as you are not restricted to a Quest headset here - this should work on any headset that supports OpenXR.
- Headset with OpenXR support
- OpenXR compatible platform (such as SteamVR, Meta, Vario, Microsoft Windows Mixed Reality).
- PC running Blender (free)
- 3D View: VR Scene Inspection Blender Addon (comes with Blender but needs enabling)
Blender + 3D View Add-On
Create 3D model
Install Add-On
Enable the Add-On by navigating to Edit > Preferences > Add-Ons and selecting the "3D View: VR Scene Inspection" Add-On.
Run OpenXR platform
Start VR session
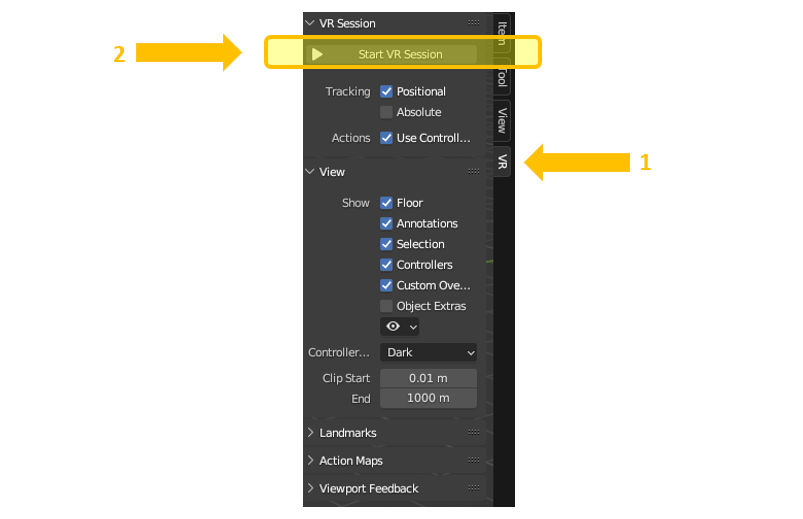
1. Navigate to 3D Viewport > Sidebar > VR tab. Note that the sidebar can also be opened using “n” keyboard shortcut.
2. Press Start VR Session
Enjoy the View
SBS Export
SBS (Side-by-Side) does not offer the same level of immersion compared to the aforementioned techniques. So far the methods facilitate viewing an object from various perspectives and incorporate stereoscopic viewing. In contrast, with an SBS image, your viewing perspective remains fixed. Nevertheless, you can still perceive the stereoscopic dimension of the 3D content.
We present 2 methods here each with different levels of features and cost:
- immerGallery: This is in our opinion the best option, but also carries a costly. It is the most feature rich for our purposes and is the simplest option to set up. It is dedicated software for the very purpose for which we are using it. Is is available for the Quest range of headsets (Meta Quest 2, Meta Quest Pro and Meta Quest 3)
- Virtual Desktop: This also is a paid version, but costs less. It however relies on a PC in addition to the VR headset. It is also not a dedicated solution, but a side feature that allows viewing in 3D of a mirrored PC screen. This solution works from a macOS host as well as from a Windows host.
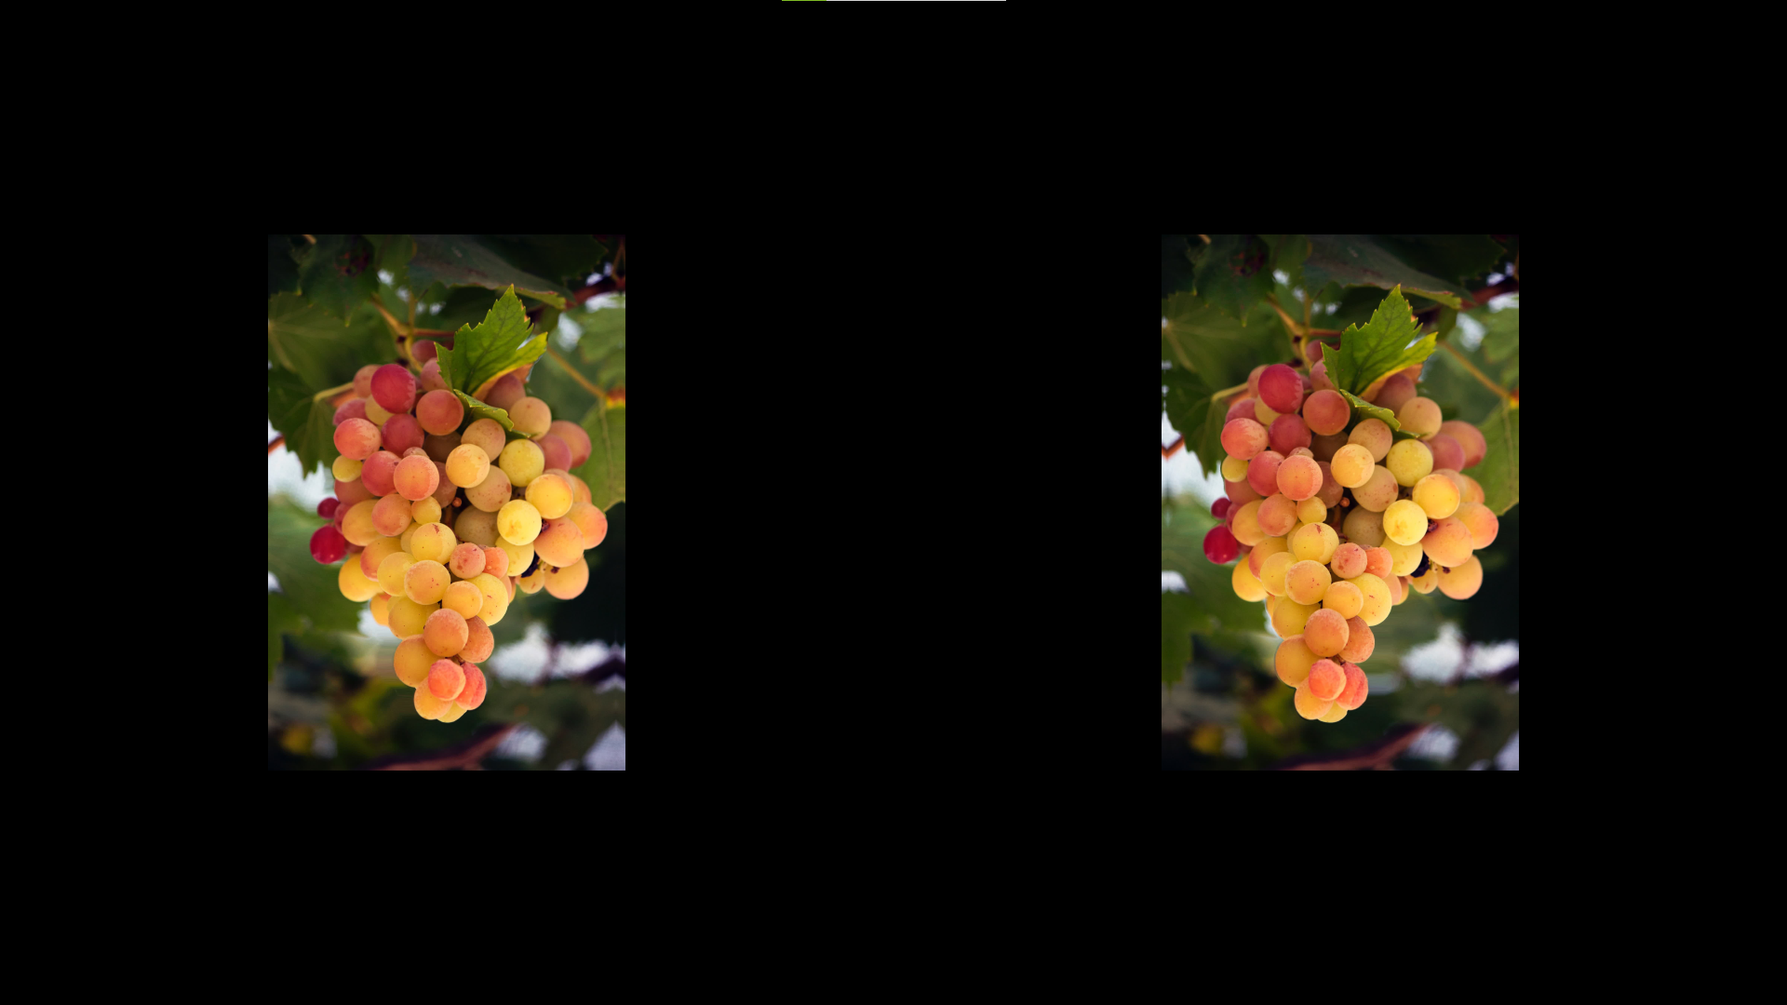
In both of these methods, a preliminary step is needed before using them. This step involves exporting the image in Side-by-Side (SBS) format. In LeiaPix export the "SBS Parallel" file.
This file has two images on it, one for the left eye and one for the right eye. It is a full width SBS in that the aspect ratio in all directions is maintained from the original.
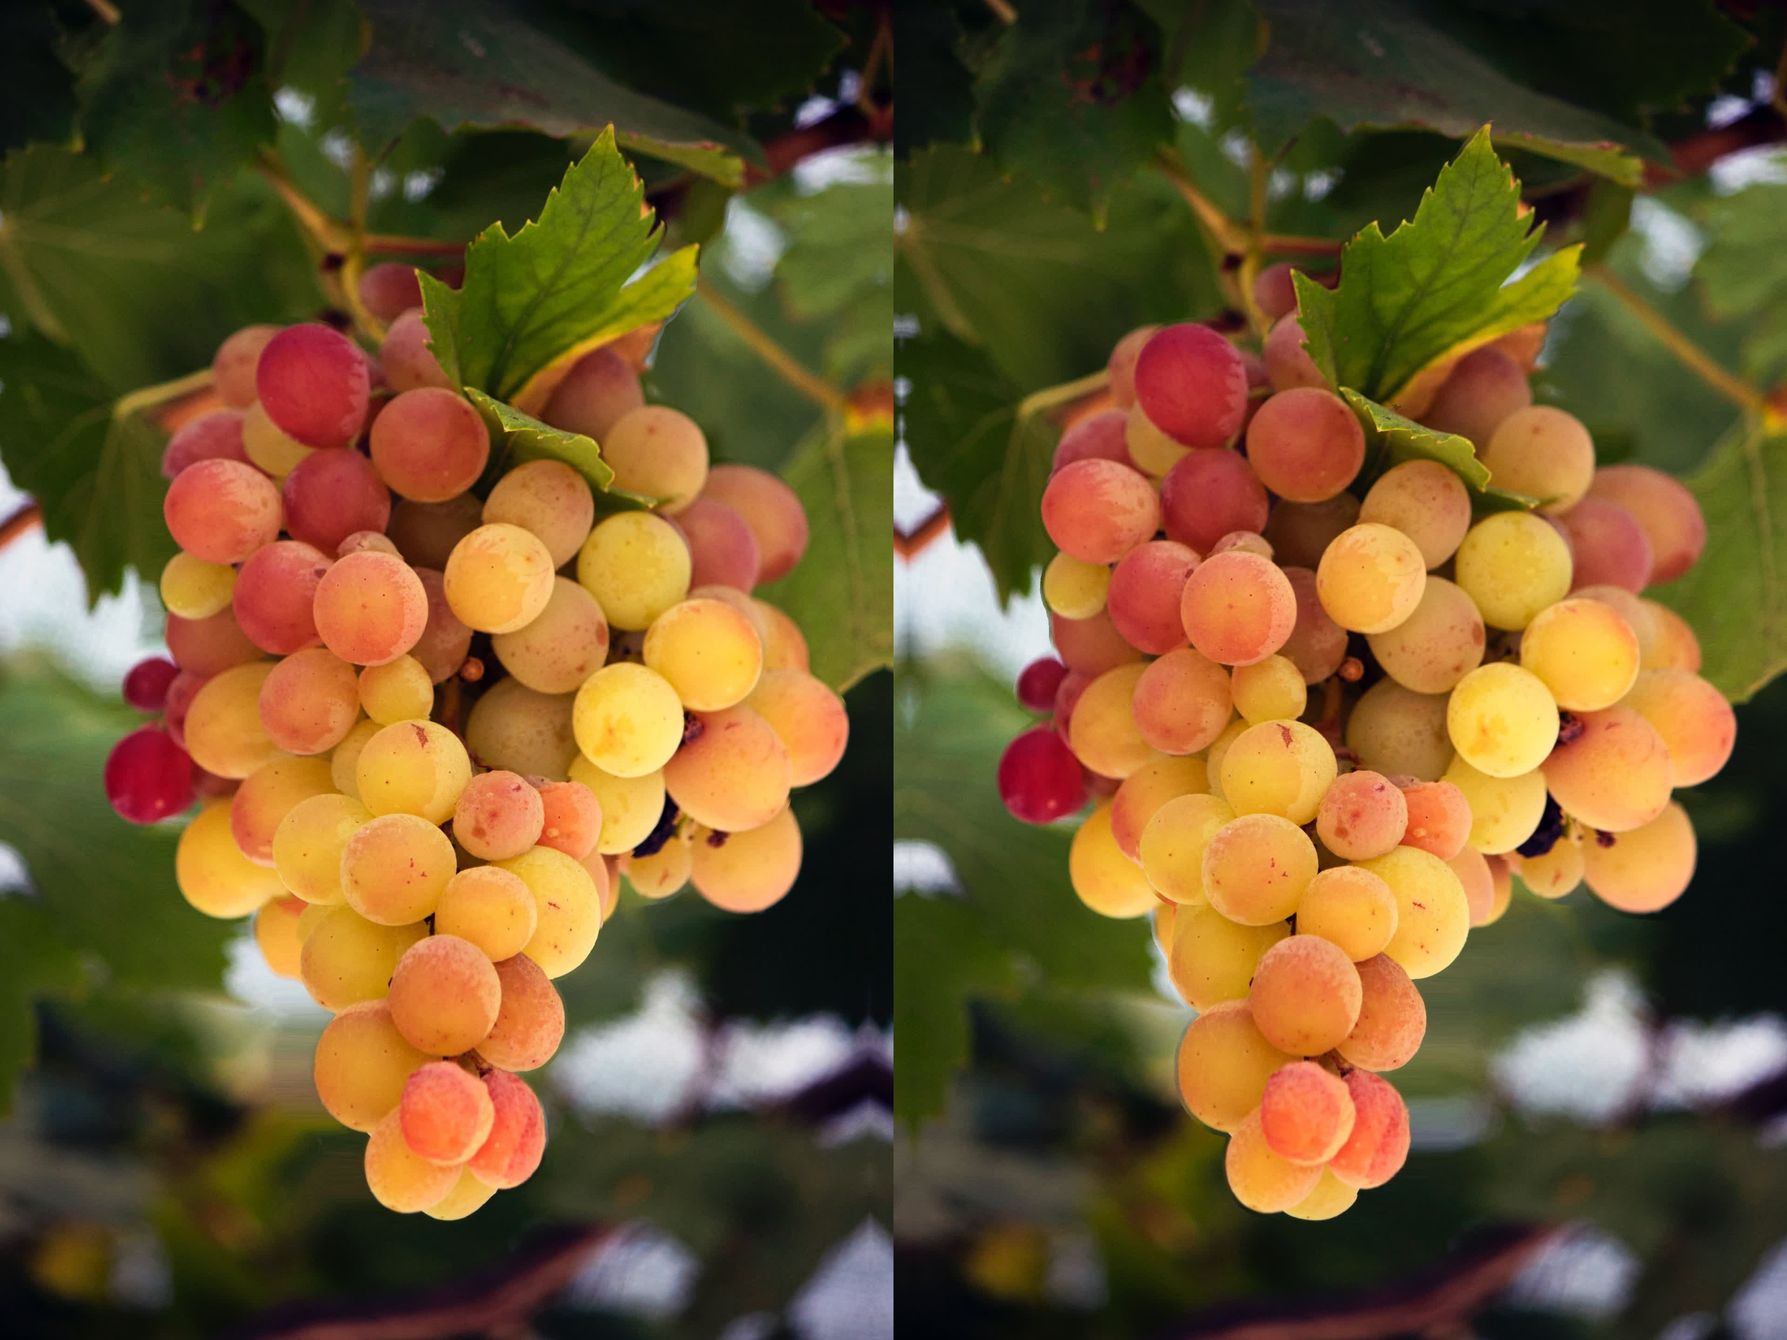
SBS Image
immerGallery (paid solution)
- Meta Quest 2, Meta Quest Pro or Meta Quest 3
- immerGallery App for Quest device
Install immerGallery

Transfer Files
Open the SBS file in headset

Enjoy the View
Enjoy the View
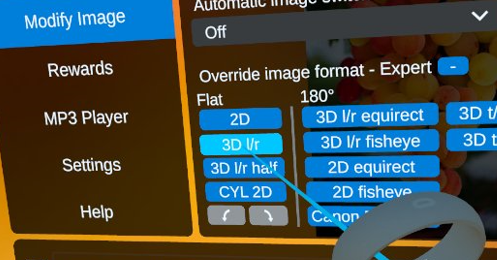
1. Navigate to Modify Image
2. Press “+” to go to Expert settings Override image format - Expert
3. Select 3D l/r to ensure that full width SBS image is recognized
Virtual Desktop (paid) + Stereo Photo Maker (free) + Windows PC
- Oculus Quest 1,2,3, Pro, Rift, Rift S
HTC Vive, Vive Pro, Vive Cosmos, Vive Focus 3, XR Elite
Pico Neo 3, Pico 4 - Stereo Photo Maker free App for Windows
- Virtual Desktop Streamer App running on PC
- Virtual Desktop VR Headset App running on VR Headset
- Windows or MacOS
Virtual Desktop Setup

Stereo Photo Maker
3. Click on the app logo and it will open to a blank screen.
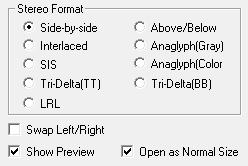
6. Move the Stereo Photo Maker window to the monitor that you will mirror to your Virtual Desktop app.
Stereo Photo Maker should now show something like this:
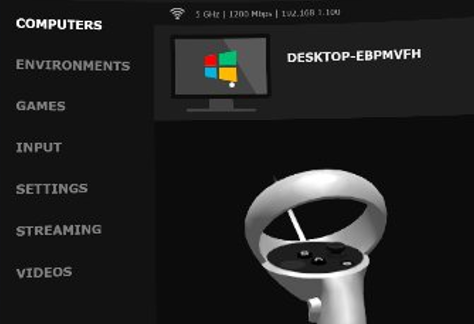
Connect to PC
2. Open Virtual Desktop App on your VR Headset
3. Click on the computer you want to connect to


Enjoy the View
- use spacebar / backspace to go next / previous image
- click on screen then use joystick to zoom in / out
- use left/right arrow keys to change the depth position